It seems projects using embedded micro-controllers are quite popular, with many references to them on
Hack a Day and
instructables. I decided to take the plunge.
I'm cheap, so spending $25 for an
Arduino UNO was out of the question. For that price, my money would be better spent on a
Raspberry Pi. A UNO clone for ~$10, or a
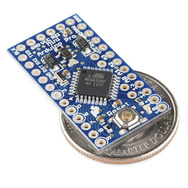
DigiSpark ($11.95 shipped) was looking more attractive. I decided to order a variant of
Sparkfun's Pro Mini from
Fasttech for $5.25.
I could have gone for an even cheaper option of a
bare ATtiny85 (and did order a couple of these as well), but wanted a more complete functioning Arduino-compatible board to start off with. The AVR CPUs on the Arduino boards have bootloader firmware pre-installed, making programming a bit simpler. LadyAda has
a tutorial on AVR programming, so I won't duplicate it. The bootloader uses serial TTL (0-5V) to communicate with the development host - both for downloading code and for your code to write to the host. Comm ports on a computer (RS232) typically use -12 to +12V, so I'll either need to build
a simple serial port adapter, or buy
a USB to TTL serial adapter. Since most new computers don't have serial ports, I'll probably go the USB route.
I'm planning to do my development in C under Linux. That requires installing avr-gcc and binutils. The package I installed are
cross-avr-gcc, cross-avr-binutils, and avrdude. The
Arduino IDE is available for Linux, however I'm comfortable with vi and a shell prompt. The Arduino libraries are in C++, and given the limited code space I'll be dealing with (8K in the ATtiny85), I want the code size efficiency of C.
Arduino Lite provides the basic functions of the Arduino library in less than half the code size.
No comments:
Post a Comment